


How to Fix Rising Damp in Walls
If you’ve noticed damp marks creeping up your walls, a musty smell in certain rooms, or paint that just won’t stay on no matter how many times you repaint, you’re probably dealing with rising damp. It’s one of the most frustrating problems I see in Johannesburg homes, especially in older properties or places with poor drainage.
I’ve seen how rising damp quietly destroys walls, skirting boards, and flooring, often long before the homeowner even realizes what’s happening. But the good news is that it’s completely fixable — and when done properly, it won’t come back.
In this post, I’ll explain exactly what rising damp is, how to spot it early, what causes it, and the proven steps my team and I use to stop it for good. I’ll also share a few stories from real jobs, explain how we handle subsoil drainage, and offer prevention tips to protect your home before the next rainy season.
What Exactly Is Rising Damp?
Rising damp happens when moisture from the ground moves upward through your walls. Bricks and mortar are porous, which means they naturally absorb water. Over time, if there’s no proper barrier to stop that moisture, it travels up the wall like a sponge — carrying salts and minerals with it.
Those salts then dry on the surface of your plaster and paint, creating that familiar white, powdery residue. The moisture itself causes bubbling, peeling, or dark damp patches.
In simple terms, rising damp is the result of your walls acting like a straw, drawing in moisture from the ground below.
In many South African homes, especially older ones, the problem starts because the damp-proof course (DPC) has failed or was never installed properly. In some cases, the DPC is buried too low under ground level, or it’s been bridged by paving, plaster, or garden beds that sit too high against the wall.
I remember visiting a client in Randburg who had this exact issue. Their garden soil had slowly built up over the years, and it was now higher than the DPC line. Every time it rained, that wall soaked up water like a sponge. Once we corrected the soil level and installed subsoil drainage, the problem never came back.
How to Identify Rising Damp in Walls
Rising damp can be sneaky. It starts slowly and often gets mistaken for something else, like condensation or leaking pipes. But there are a few tell-tale signs I’ve learned to look out for:
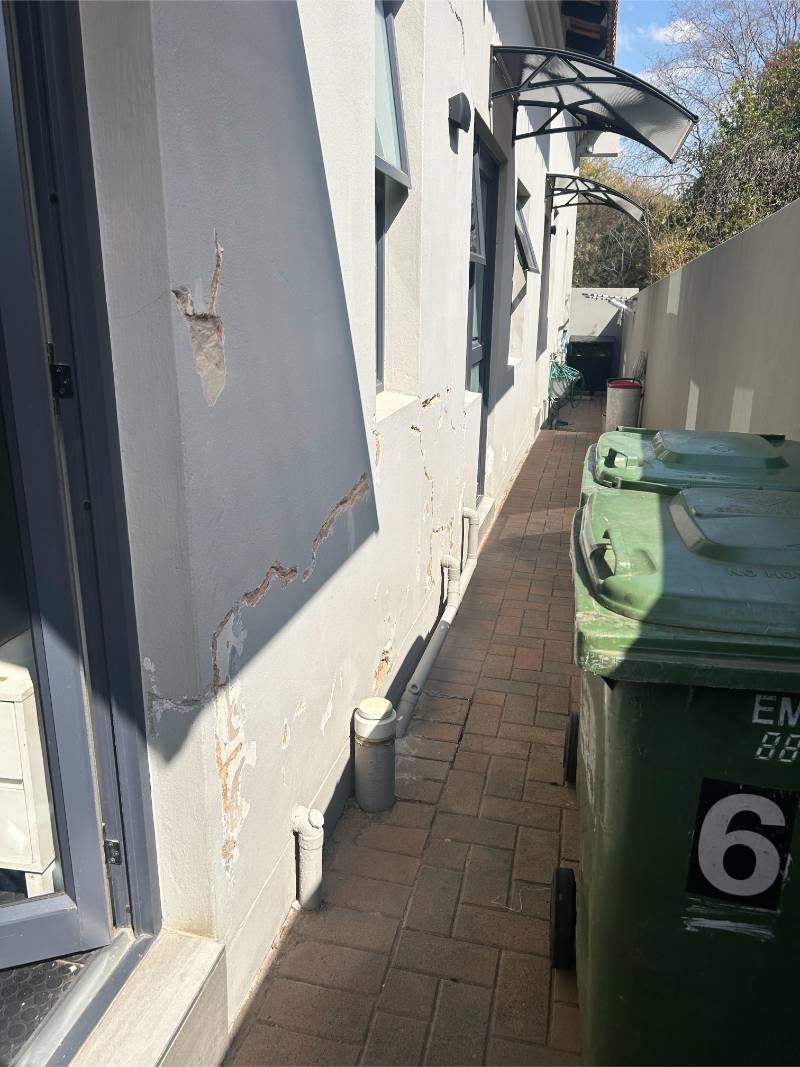
- Peeling or bubbling paint near the bottom of walls
- A musty, damp smell that never goes away
- White powdery salts or efflorescence on the surface
- Flaking plaster and soft spots on skirting boards
- Mould or dark patches up to about one metre high
If the problem appears higher up the wall, it’s usually not rising damp — it might be penetrating damp (from outside leaks) or condensation. Rising damp almost always affects the lower sections of walls because it comes from ground moisture.
When I inspect a home, I always start by checking the external walls and ground levels. If the paving or flower beds are higher than the internal floor, that’s a red flag. I also use a moisture meter to measure how far the dampness extends. It’s a simple but powerful tool that confirms whether moisture is wicking upward or coming from somewhere else, like a leaking pipe.
In many of the homes I’ve worked on around Fourways, Bryanston, and Bedfordview, the pattern is the same — damp patches appear on the lower half of walls, especially after a heavy summer rain. That’s a classic sign of rising damp combined with poor subsoil drainage.
The Most Common Causes of Rising Damp
Rising damp usually has more than one cause. Here are the main ones I encounter:
1. Damaged or Missing Damp-Proof Course (DPC)
The DPC is a waterproof barrier installed in the wall just above ground level. In older buildings, the material often deteriorates over time. In newer homes, sometimes it was never properly installed. Once the DPC fails, there’s nothing to stop moisture from rising through the wall.
2. Poor Subsoil Drainage
Even a perfect DPC can’t do much if the surrounding soil is always saturated. Water sitting against the foundation creates constant pressure on the walls. Over time, that moisture finds its way in.
This is one of the biggest issues I see in Johannesburg because of the clay-based soil and heavy summer storms. When the soil doesn’t drain well, water just lingers.
3. External Ground Levels Too High
If paving, lawns, or flower beds are higher than the DPC, they bridge the barrier and allow moisture to bypass it completely. You’ll often see this where homeowners added new paving or garden features without realizing they’ve covered the damp course.
4. Blocked or Broken Gutters and Downpipes
Water pooling near walls is a major contributor. When downpipes don’t lead water away properly, it seeps into the foundation area. Over time, that leads to both rising damp and foundation damage.
5. Cracked Foundations or Poor Waterproofing
Sometimes the issue starts deeper — with cracks or gaps in the foundation that allow groundwater to enter. In those cases, we combine foundation repair with subsoil drainage and waterproofing.
In many homes, I’ll see roof issues contributing as well. That’s where proper roof waterproofing comes in. Flat concrete roofs, tiled roofs, and metal roofs each have their own challenges. I’ll touch more on those later.
Step-by-Step — How I Fix Rising Damp
Over the years, I’ve developed a process that doesn’t just mask damp problems but eliminates them. Here’s how I approach it:
Step 1: Inspect and Confirm the Source
Before doing anything, I make sure it’s truly rising damp and not something else. That includes checking moisture levels, wall conditions, external ground height, and drainage layout. I never rush this part, because fixing the wrong problem wastes your time and money.
Step 2: Remove Damaged Finishes
Once I confirm the source, we remove any loose plaster, paint, or skirting that’s been damaged. The wall needs to breathe and dry out before repairs. Trapping moisture behind new plaster or paint is one of the biggest mistakes people make.
Step 3: Improve Subsoil Drainage
This is the most important step and what sets my approach apart. I focus on draining the water away from the wall before anything else. We install subsoil drainage — perforated pipes surrounded by gravel — to redirect groundwater away from the foundation.
In most cases, this alone stops 90% of the problem. It relieves the pressure on your walls and allows them to dry naturally.
I helped a homeowner in Fourways last month who’d spent thousands on chemical damp-proofing over the years, but the damp always came back. When we dug along the base of the wall, we found water pooling under the paving because there was no drainage at all. After installing proper subsoil drains and redoing the plaster, the walls stayed dry — even through the next two rainstorms.
Step 4: Apply Damp-Proof Treatment
Once drainage is in place, we apply a waterproofing barrier to the wall itself. Depending on the condition of the wall and the homeowner’s budget, I’ll choose between:
- Liquid rubber waterproofing — flexible, seamless, and highly durable.
- Cementitious waterproofing slurry — good for solid brick walls.
- Torch-on membrane — ideal when working along foundations or large exterior walls.
- Chemical DPC injection — sometimes used in older homes when external excavation isn’t possible.
Each method has its place, but I’ll always explain the pros and cons before starting.
Step 5: Replaster and Paint
Once the wall is dry and waterproofed, we replaster using breathable materials designed for damp areas. Using the wrong type of plaster or paint can trap moisture and cause the problem to reappear. Finally, we repaint using high-quality damp-resistant paint that allows moisture to escape naturally.
Why I Prefer Subsoil Drainage Over Quick Fixes
Chemical damp-proofing injections and “damp seal” paints can work temporarily, but they don’t address the underlying issue — which is groundwater pressure. If water is constantly sitting against your foundation, it will always find a way through.
Subsoil drainage fixes the real problem by removing that water altogether. It’s like solving the cause instead of treating the symptom.
In Johannesburg, our clay soil makes this especially important. Clay holds onto water much longer than sandy soil. After a heavy rain, it can stay saturated for weeks. Without proper drainage, the base of your walls never gets a chance to dry out.
When I explain this to homeowners, I often compare it to a blocked sink — if you don’t clear the drain, no amount of sealing around the edges will help.
Other Waterproofing Methods That Help Prevent Damp
Rising damp often goes hand in hand with other waterproofing problems, so it’s worth understanding the main ones. Here’s a quick overview of how they connect:
Flat Roof Waterproofing Methods
Flat roofs are common on many Johannesburg homes and offices. The problem is, they don’t shed water as well as sloped roofs. Over time, cracks and pooling cause leaks that run down interior walls and mimic rising damp. Using proper torch-on membranes or liquid rubber coatings keeps water out and protects your walls below.
Tiled Roof Waterproofing Tips
Tiled roofs leak when underlay or flashing is damaged. I’ve seen several homes where roof leaks caused damp marks halfway down walls, confusing the homeowner into thinking it was rising damp. Regular maintenance, replacing cracked tiles, and sealing ridge caps makes a huge difference.
Metal Roof Waterproofing and Rust Prevention
Corrugated and IBR roofs are durable but prone to rust and screw-hole leaks. Once water gets under those sheets, it can travel along the purlins and cause ceiling or wall dampness. A simple anti-rust treatment followed by a proper waterproof coating keeps it secure.
Torch-On Membrane vs Liquid Rubber: Which Is Better?
Both are excellent products but used in different situations. Torch-on membranes are ideal for large, flat surfaces and high-traffic areas. Liquid rubber is more flexible and perfect for irregular or vertical surfaces, like foundation walls. I often use both together depending on the job.
Understanding these other waterproofing methods helps you protect your home from every angle — not just from rising damp but from leaks that could make it worse.
How Much Does Rising Damp Treatment Cost?
The cost depends on the size of the affected area, how deep the issue goes, and which methods are needed.
As a general guide, small residential jobs that involve minor drainage and wall treatment can start from around R3,000–R5,000, while full-scale rising damp repairs with subsoil drainage and plaster restoration often range between R10,000–R30,000+ depending on the extent.
Here’s what typically influences the cost:
- Wall length and height affected
- Accessibility (e.g., tight spaces, paved areas)
- Need for drainage excavation
- Type of waterproofing product used
- Replastering and repainting requirements
I always tell clients not to chase the cheapest quote. Many contractors offer quick fixes — usually chemical injections or sealants — that look fine for a few months but fail once the next rainy season hits. Proper rising damp repair is an investment that protects your walls, paintwork, and even the resale value of your home.
If you’d like a detailed breakdown of general pricing for other waterproofing work, it’s worth learning about roof waterproofing costs, which follow a similar logic — preparation, product type, and surface condition all play a big role.
How to Prevent Rising Damp from Coming Back
Once your walls are dry and repaired, the key is to keep them that way. Here are the maintenance tips I always share with homeowners:
1. Keep Ground Levels Below the Damp-Proof Course
Make sure the soil, paving, or flower beds outside sit at least 150 mm below your DPC line. This small step prevents bridging.
2. Maintain Good Drainage
Clean gutters and downpipes regularly. Make sure downpipes discharge water away from your walls — ideally into stormwater drains or soakaways.
3. Inspect Roof Waterproofing
A leaking roof can quickly lead to damp walls, especially along the top sections. Regularly check your flat, tiled, or metal roof for cracks or failed sealants.
4. Repaint with Breathable, Damp-Resistant Paint
Not all “waterproof” paints are equal. Choose one that allows moisture inside the wall to evaporate outward instead of trapping it.
5. Check Before the Rainy Season
Do a quick home inspection every September before the heavy rains start. Look for bubbling paint, musty smells, or areas where water pools near the house. Fixing small issues early is always cheaper than waiting until it spreads.
A well-maintained home can go decades without damp returning. For broader upkeep advice, I often recommend learning a few roof maintenance tips to extend your roof’s lifespan — keeping water out from above is just as important as managing it below.
When to Call a Professional
If the damp has spread across several rooms, you see white salts forming again after repainting, or the plaster feels soft to the touch, it’s time to call for help.
Rising damp is not something you can truly fix with DIY sealants or dehumidifiers. Those only treat the symptoms.
When I do a site visit, I assess both the inside and outside of your walls, check drainage, measure moisture levels, and look for patterns that tell me exactly where the water is coming from. I’ll explain the problem clearly and outline what needs to be done — no guesswork, no sales pitch.
Final Thoughts
Rising damp can look like a hopeless problem, but it isn’t. Once you understand the cause and fix it properly, your walls can stay dry for good. The key is to tackle it from the outside, not just patch it up from within.
If you’re dealing with damp walls or musty smells, don’t wait for it to get worse. I offer free call-outs across most of Johannesburg, and I’ll personally inspect your property to find the right solution. Just send me a message and I’ll take a look.